Creating your first PopCash ad campaign is simpler than it looks. If you’ve deposited funds and you’re staring at the campaign creation screen wondering where to start – don’t worry. This guide walks you through every setting, what it actually does, and why it matters.
TL;DR
Step-by-step guide to launching your first PopCash ad campaign: name your campaign and add your landing page URL, set total and daily budget, configure your CPM bid, apply a frequency cap, toggle blank referrer and content type, then target your audience by GEO, device, OS, browser, and language. Once live, optimize with dayparting, blacklist/whitelist management, and conversion tracking via internal dashboard or postback URL.
PopCash is one of the leading popunder ad networks, with millions of daily impressions across the globe. Once you know how the controls work, launching and optimizing your PopCash ad campaign becomes pretty intuitive.
⚠️ Before you begin: Make sure your advertiser account is set up and your account has funds. From your dashboard, head to the Advertiser’s Campaign tab and click “Create Campaign.”
Step 1: Name Your PopCash Ad Campaign and Add Your Landing Page URL

Start your PopCash ad campaign with a name that actually tells you something at a glance, especially helpful if you end up running several campaigns at once. Something like “Sweeps LATAM” or “eComm US Desktop” is much more useful than “Campaign 1” when you’re reviewing performance data later.
Paste your landing page URL into the designated field. You can also add tracking tokens here – these are dynamic variables that let you capture specific data points (like traffic source, device, or GEO) and pass them through to your analytics or tracker.
Step 2: Set Your PopCash Ad Campaign Budget and Daily Spending Limits
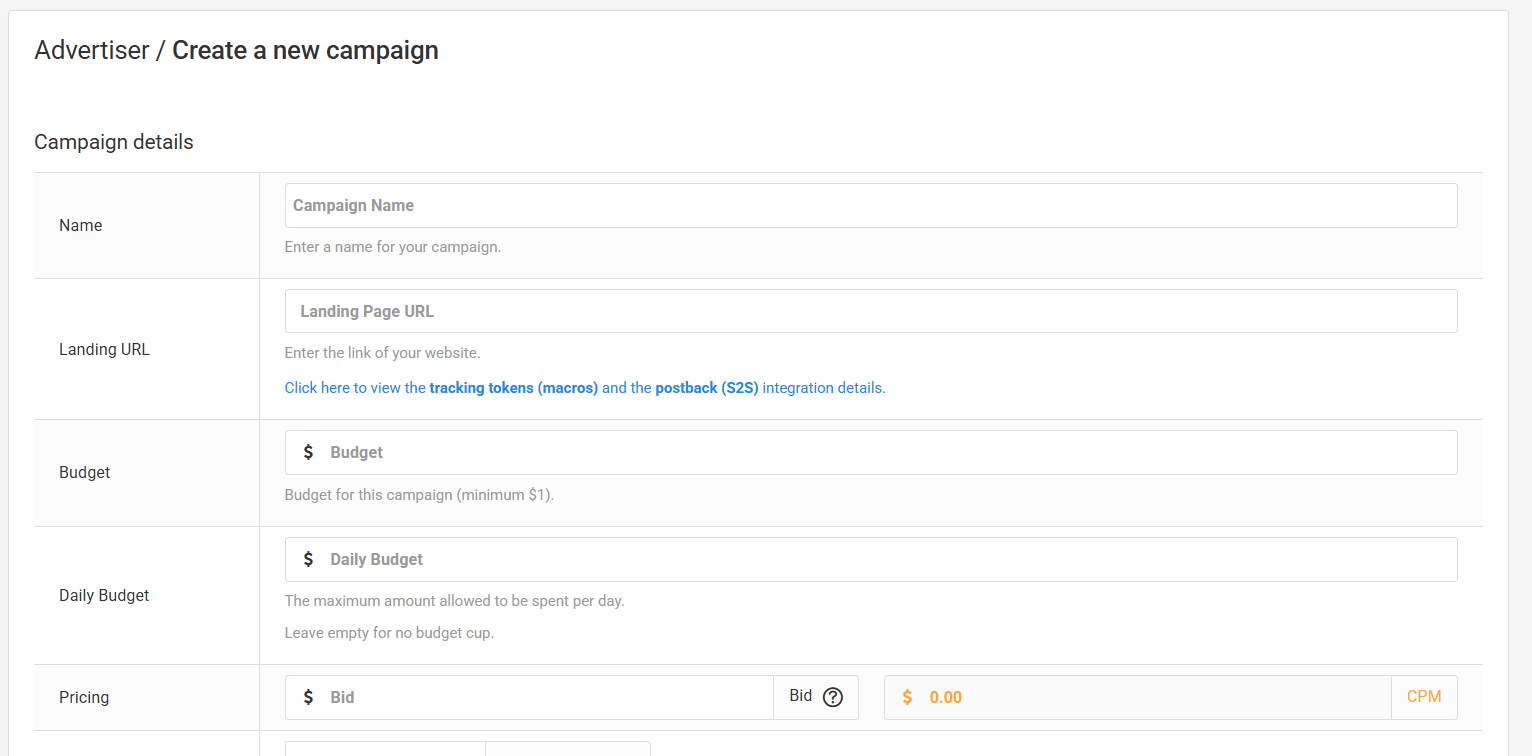
This is one of the most important decisions you’ll make during setup. You can define a total budget for the whole campaign run, and optionally add a daily cap that draws down from that total.
If you’d rather not limit daily spend at all, leave the daily limit blank. Your campaign will spend freely up to the total budget, giving you maximum flexibility during early testing phases.
Step 3: Understand CPM Bidding for Your PopCash Ad Campaign
Your bid is the exact amount you’re prepared to pay per individual impression. PopCash uses CPM pricing – Cost Per Mille, or cost per 1,000 visits.
Quick example: 10,000 impressions divided by 1,000 equals 10 units. If your total spend was $20, your CPM is $2.
Before you lock in your bid for your PopCash ad campaign, check PopCash’s live traffic inventory. It shows current market rates and available volume for your target regions and categories, which takes a lot of guesswork out of setting a competitive bid.
Step 4: Set a Frequency Cap for Your PopCash Ad Campaign
Frequency capping controls how many times a single unique visitor can see your ad within a 24-hour window. You can set this anywhere up to 99, though keeping it lower is almost always the right call.
Without a cap, you risk burning through budget serving the same people over and over while missing fresh audiences. A sensible frequency cap stretches your spend further and helps avoid the kind of ad fatigue that tanks conversion rates. See our frequency capping guide for recommended settings.
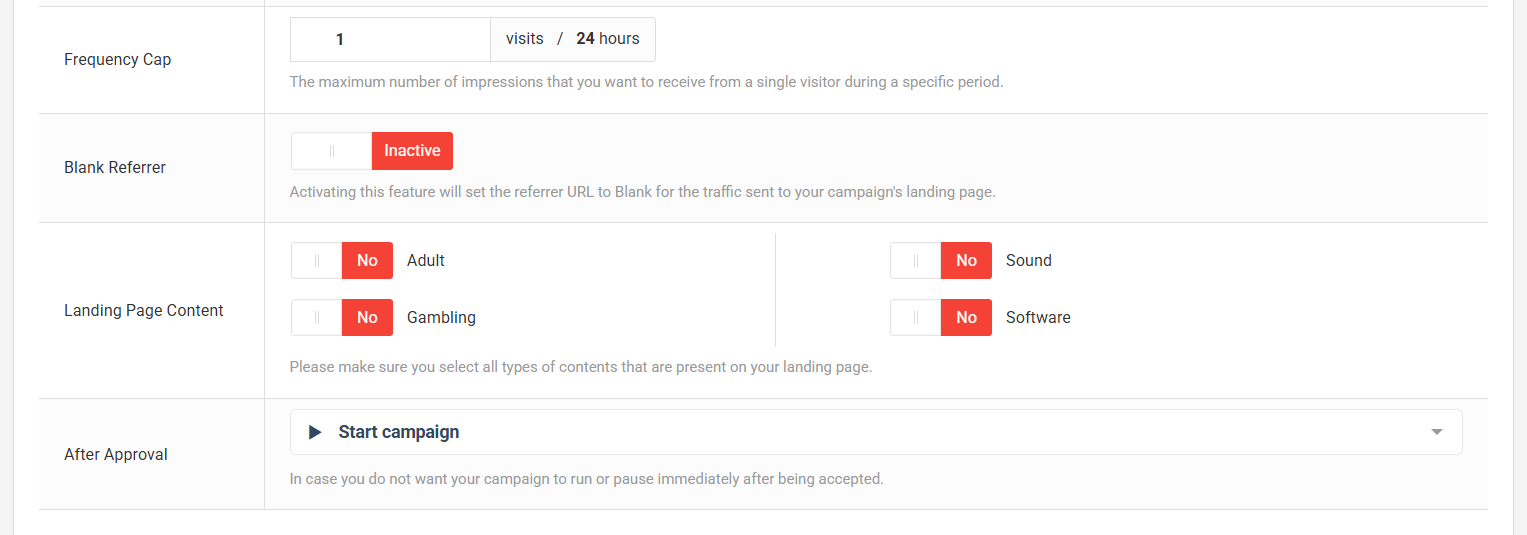
Step 5: Configure Blank Referrer and Content Type in Your PopCash Ad Campaign
The Blank Referrer option masks PopCash as the source of your traffic. Visitors will arrive looking like direct traffic, as if they typed your URL manually, rather than showing a PopCash referral. Useful if your landing page behaves differently based on traffic source.
The Landing Page Content Type tells PopCash what your page is about. Select every category that fits – Adult, Gaming, Sound, Software, etc. Accurate categorization is how you ensure your campaign reaches the audience segments most relevant to your offer.
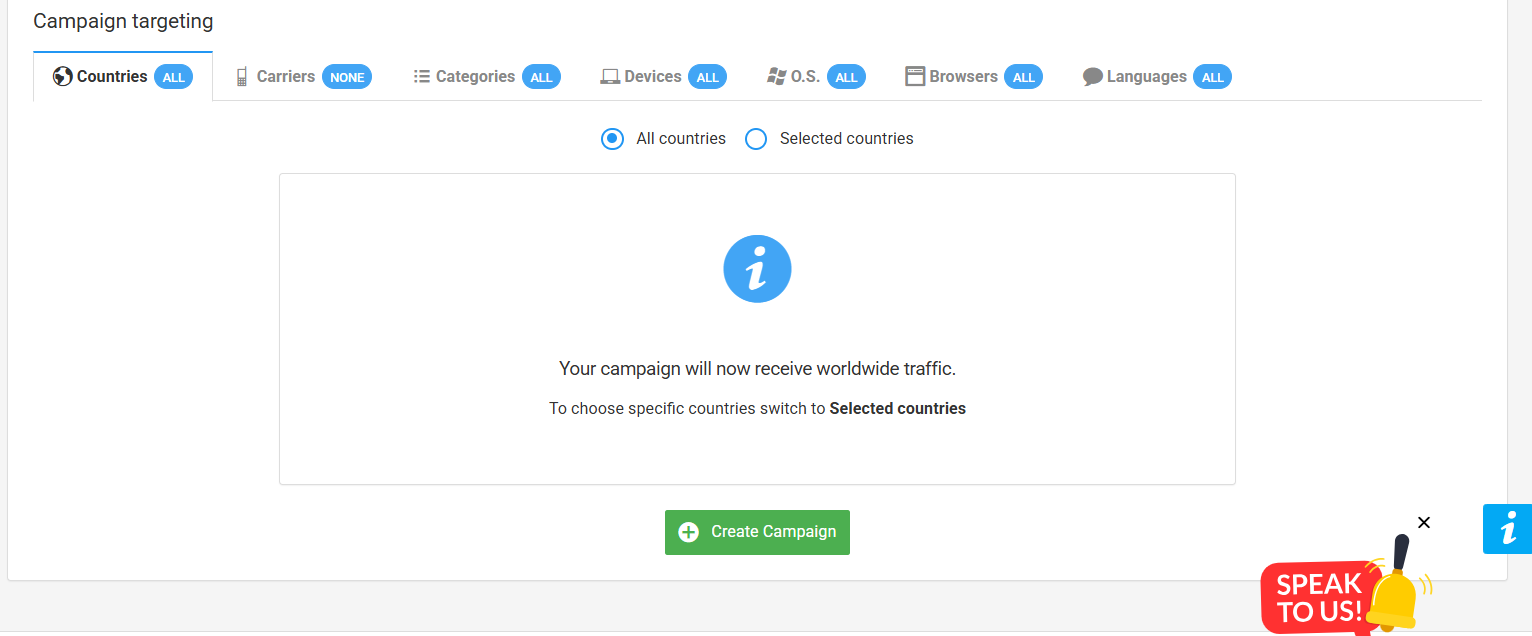
Step 6: Target Your Audience in Your PopCash Ad Campaign
This is where you get specific about who sees your ads. For each option, move your selections from the left column to the right to activate targeting. Here’s what you can control:
- Countries (GEOs): Focus budget on the markets most likely to convert for your offer.
- Carriers & Connection Type: Choose between mobile 3G and Wi-Fi, or narrow down to specific carriers.
- Content Categories: Pick the site types you want your ads to appear on.
- Devices: Desktop, laptop, smartphone, tablet, or other connected devices.
- Operating Systems: Windows, macOS, Android, iOS, Linux, and more.
- Browsers: Chrome, Firefox, Safari, Edge, or others.
- Languages: Serving ads in a user’s native language consistently improves engagement and conversion rates.
The more precise your targeting, the more useful your performance data becomes. Granular targeting means you can see exactly what’s working and where – which makes optimization much faster.
Once everything looks good, click “Create Campaign” – your PopCash ad campaign is now live.
PopCash Ad Campaign Optimization: Dayparting
After your campaign has been running for a bit and you’ve gathered real data, dayparting is one of the most powerful tools you’ll have. It lets you control exactly when your ads run – specific days of the week, specific hours, specific time zones.
The goal is simple: concentrate your spend during the windows when your audience is most likely to convert, and stop wasting budget on hours that consistently underperform.
PopCash Ad Campaign Optimization: Blacklists and Whitelists
As your campaign accumulates data, patterns will emerge. Some traffic sources will consistently underperform; others will punch above their weight.
- Blacklist: Block the sites that aren’t delivering results. Cutting low-quality sources directly reduces wasted spend. Read our blacklist and whitelist optimization guide for a step-by-step approach.
- Whitelist: Identify your best-performing sources and build a list that receives your traffic exclusively. Concentrating spend on proven placements can dramatically improve ROI.
Managing both lists actively is one of the fastest ways to improve campaign efficiency.
PopCash Ad Campaign Conversion Tracking
You can’t optimize what you can’t measure. PopCash supports two tracking approaches. For a deeper look at how popunder traffic converts, check our popunder traffic guide:
- Internal Tracking: PopCash’s built-in tracker records conversions right in your dashboard, supporting up to two distinct actions per unique visitor.
- External Tracking: Connect via postback URLs. Supported platforms include Voluum, Binom, Keitaro, BeMob, RedTrack, ClickFlare, CPVLabPRO, AdsBridge, FunnelFlux, Skro, MaxConv, and PeerClick.
Running both simultaneously gives you the most complete picture of how your PopCash ad campaign is actually performing across your whole funnel.
Start your first PopCash ad campaign today → Sign up free